Pebbledash removal
Pebbledash Removal Doncaster: Stripping and Re-rendering
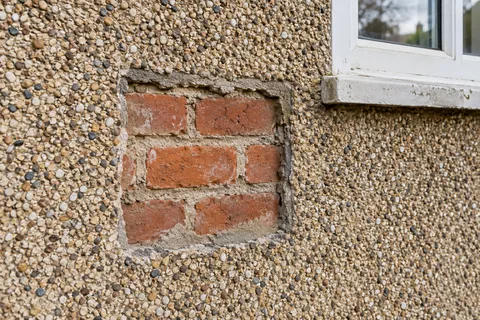
Pebbledash is a render with small stones thrown into its wet top coat. If your 1930s or post-war house is dashed, removing it is a substantial job: two layers of cement render are hacked off, the brick beneath is repaired and the wall is rendered again. Sometimes it is the right answer and sometimes the dash can stay, so start with what the old finish is doing.

On this page
What pebbledash is made of
A dry-dash finish is built in two stages. K Rend's instructions for its own dash system describe an 8-10mm base coat, then a butter coat of dash receiver about 8mm thick, depending on the size of the stones. While that coat is still soft, washed aggregate is thrown on to give an even, dense cover and tamped lightly in with a float. Older dash was often mixed on site, but the principle is the same: a cement backing with a stony face.
Removing it therefore means removing both layers. The weight of material that comes off a single elevation is considerable, so skips, waste routes and dust protection are part of the plan from the start.
For example, on a hypothetical 1930s semi with dash on the front and side, the rear might be plain painted render added later. The front and side would be stripped together and the rear assessed on its own; if it is sound, it can be recoloured to suit the new finish, with the change of system made at the back corners where a bead gives a clean line.
- Trial area A small patch is taken off to see how well the dash is bonded and what lies beneath.
- Removal Dash and backing render are hacked off to masonry or to a sound backing coat.
- Clear and dispose Debris is bagged or skipped; this is heavy, dusty and noisy work.
- Repair the masonry Exposed bricks, blocks and joints are repaired before anything new goes on.
- New render system The wall is rendered with the chosen system, or left as fair-faced masonry if suitable.
The usual order of work. The survey and the chosen products decide the actual steps.
Remove it, or keep it?
Tap the dash across each wall. A solid note over the whole face, with only fine cracks, means it is still bonded; it can be painted, or levelled with a base coat and given a new finish, without stripping. A hollow, drummy sound over large areas, bulges, cracks you can push a coin into, stones falling out or dash running down over the DPC to the ground are reasons to take it off.
SPAB notes that cement coatings tend to fail in patches and detach, so a few hollow spots can grow. A coat laid over failing dash fails with it. A useful compromise on a mixed house is to strip the failed elevations and keep a sound one, provided the transition is planned at a corner or bead rather than in the middle of a wall.
Hacking off and what you find
The dash is broken off with hammer and bolster or a small breaker, working down from the top of the scaffold. Start with a trial area on each elevation. SPAB warns that levering off large sheets of cement can pull the faces off soft bricks or stone, which turns a removal job into a brick repair job.
Underneath you may find good facing brick, common brick never meant to be seen, old patch repairs, filled-in doors or windows, or bricks damaged by the original hacking that gave the dash its key. That is why exposed brick is a hope, not a promise. Once the wall is bare, loose joints are repointed, damaged bricks replaced and hollows dubbed out. A saturated wall should be allowed to dry before new render goes on.
Tap-test every elevation and agree which walls are stripped.
Scaffold, sheet the windows and protect paths, drains and neighbours' property.
Hack off a trial area, then strip the dash and backing coat from the top down.
Clear the debris, rake out joints and record what the brickwork shows.
Repair bricks and joints, dub out hollows and let the wall dry.
Fix a bell-cast bead above the DPC and new corner and stop beads.
Apply the new base coat and mesh, then the chosen finish.
The new render and the base of the wall
Old dash often runs right down to the ground. The new render should stop above the DPC on a bell-cast bead, because K Rend's guidance says render should not bridge the DPC and create a path for damp. Over a stripped wall of mixed brick and repairs, a meshed base coat helps the new system cope with the different backgrounds. The finish can be a scraped monocouche, a silicone thin coat or a smooth sand-and-cement coat for painting. Keep photographs of the bare wall; they show the next owner what lies behind the new finish.
Common questions
How long must the wall be left between stripping and re-rendering?
There is no single figure. A dry wall can be repaired and base-coated once the debris is cleared; a wall that is wet behind failed dash needs time to dry, which SPAB also advises after removing cement. Each product then sets its own waiting times, such as the 14 days K Rend asks for between its base coat and its silicone finish.
See housing and planning information for Doncaster and nearby places, including the source and geography behind each figure.