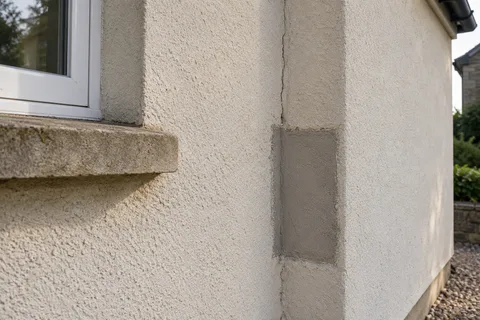
Render respray and colour change
Render Respraying Doncaster: Changing the Render Colour
A respray changes the colour of render that is still doing its job. The wall is cleaned, small defects are repaired, everything that should not be coated is masked, and a masonry coating is sprayed on. It is far less disruptive than re-rendering, but it only works on render that is firmly bonded. Paint does not hold failing render on.

On this page
Is the render sound enough to recoat?
Tap the render all over before choosing a colour. A solid note means the coat is bonded; hollow-sounding areas need cutting out and repairing first, and if they cover most of a wall, a new coating is money spent on a surface that is about to fail. Look at any existing paint as well. Flaking or powdery paint has to be removed or stabilised, or the new coat will lift with it.
Most cement-based renders can take a masonry coating; K Rend, for example, says its render is a suitable surface for masonry paint if a colour change is wanted later. Lime render is different. Mike Wye and SPAB both advise limewash or a breathable silicate paint on lime rather than ordinary modern paint, which can trap moisture.
- Clean Washed down, with algae and mould treated and left to work.
- Repair first Cracks and hollow patches are repaired before any coating.
- Prime or stabilise Where the coating maker requires it on that surface.
- Coating Usually two coats of a breathable masonry or silicone coating.
The usual order of work. The survey and the chosen products decide the actual steps.
Preparation: cleaning, algae and repairs
Green and black staining on north-facing walls is usually algae, and it has to be killed and washed off, not painted over. K Rend's instructions for its finishes describe a warm wash with a suitable detergent at carefully adjusted pressure, so the surface is not damaged, plus a fungicidal wash on walls prone to algae. The wall then needs to dry before coating.
Cracks are raked out and filled, blown patches are cut back and rebuilt, and the repairs are left to cure as their product requires. Pipes, lights and alarm boxes are taken off or masked. Windows, doors, sills, paths, plants and cars nearby are sheeted, because spray drift travels further than people expect; K Rend's own monocouche sheet asks for polythene over doors and windows during spraying.
Tap-test the render and inspect the existing paint.
Kill algae, wash the walls and let them dry.
Fill cracks and rebuild any hollow patches; let repairs cure.
Remove or mask fittings and sheet glazing, doors, paths and planting.
Prime where the coating maker requires it.
Spray the coating in the specified number of coats, finishing each elevation to a natural break.
Spraying the coating
Spraying gives an even film over textured or dashed render faster than a roller, and the sprayed coat is often back-rolled to work it into the surface. Follow the coating maker's limits on temperature, damp and drying time, and avoid rain and frost while it dries. Each elevation should be finished from corner to corner or to a downpipe in one session, because a coat that has dried and is then overlapped can leave a visible band.
Choose the coating for the render, not only the colour. A standard masonry paint suits sound cement render; a breathable mineral or silicate coating suits lime. Ask what the product's data sheet says about recoating and cleaning before you commit.
Choosing the colour
Paint a sample on the wall itself, at least a square metre on a face that gets ordinary daylight, and look at it in the morning and evening. Colour on render reads differently from a chart because texture throws small shadows. Compare it with the roof, frames and any brick that stays visible. If the house is in a conservation area, check with the council before a strong change of colour.
For example, a hypothetical post-war semi with magnolia render gone grey and green on its north side would be treated for algae and washed first, then have its cracks filled and two small hollow patches cut out and rebuilt. Only after the repairs had cured would the walls be masked and sprayed, so the new colour sits on a clean, sound and dry surface rather than over the old staining.
Common questions
Will a new coating cure damp patches inside?
Not on its own. If rain is getting in through cracks or hollow areas, those need repairing before any coating goes on. If the render runs down over the DPC, the base of the wall needs cutting back to stop above it; a fresh colour over that detail leaves the damp route in place.
Can pebbledash be resprayed?
Yes, if the dash is firmly bonded. The coating has to be worked into the gaps between the stones, which uses more material and takes longer than smooth render. Hollow areas still need repairing first; a dashed wall with widespread hollowness is a candidate for [removal](/pebbledash/) rather than recolouring.
See housing and planning information for Doncaster and nearby places, including the source and geography behind each figure.