Whole-house rendering
House Rendering Doncaster: Re-rendering the Whole House
House rendering treats every elevation as one job. Each wall is checked, failed render or dash comes off, the masonry is repaired and a new system goes on with beads, sills and fittings dealt with properly. It might start with a dashed semi that has blown in patches, a painted render that has faded and crazed, or a house that needs one finish after an extension.

On this page
Re-render, overcoat or recolour: decide wall by wall
Start with the condition of each elevation rather than the finish you want. Render that gives a solid note when tapped, with only fine surface crazing, can usually be cleaned, repaired locally and recoloured, which is the respray route. Render that sounds hollow over wide areas, bulges, or has come away at the base has lost its bond and needs to come off. A sheltered rear wall can be sound while the exposed front has failed, so one house can need two different answers.
Dashed finishes need the same test. Firmly bonded pebbledash can sometimes be levelled with a base coat and refinished, but a new coat is only as good as the dash it is stuck to. If tapping finds hollow patches across the elevation, stripping is the safer course, and the pebbledash removal page explains what that involves.
A whole-house re-render can also bring building regulations into play. Approved Document L treats rendering the outside of a wall, or stripping it back to the bricks and rebuilding, as renovating a thermal element. Where that covers more than half of an element, or more than a quarter of the whole building envelope, the guidance expects the wall to be upgraded to its insulation standard where that is technically, functionally and economically feasible. Ask building control early, because the answer can turn a re-render into an external wall insulation project. The 2026 edition starts on 24 March 2027 for ordinary building work and 24 September 2027 for higher-risk building work, with transitional arrangements; establish the applicable edition for the project.
- Scaffold and protection Windows, doors, paths and planting are covered; downpipes, lights and satellite brackets come off.
- Old finish tested or removed Failed render is removed; the survey decides whether any sound areas can remain within the specified system.
- Masonry repairs and beads Cracked bricks and open joints are repaired; corner, stop and base beads are fixed.
- Base coats Sand-and-cement scratch and float coats, or a manufacturer basecoat with mesh.
- Finish coat A painted, scraped or thin-coat coloured finish, applied in suitable weather.
- Fittings and junctions Fittings are refixed through the new surface; sills, roofline and abutments are sealed.
The usual order of work. The survey and the chosen products decide the actual steps.
What happens to the walls, in order
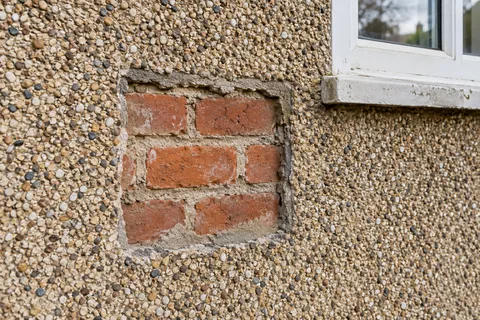
Once scaffold is up and windows, doors, paths and drains are sheeted, failed material is hacked off back to masonry or to a firm edge where sound areas are being kept. What is underneath is rarely uniform: original brick, later patching, an infilled doorway, perhaps blockwork on a rear addition. Loose joints are raked out and repointed, spalled bricks replaced and deep hollows dubbed out so the main coats go on at an even thickness.
The base coat follows. K Rend's instructions for its cement base coats give 4-6mm for its HP12 and HPX bases and 8-10mm for its UF bases, finished with a light key and left 24 hours before the next coat. Its HP14 base carries an alkali-resistant mesh where the system calls for one, which helps spread stress over mixed backgrounds. Walls are dampened first where the masonry is very absorbent, so the render is not starved of water. The finish coat then depends on the system chosen: a scraped monocouche, a thin silicone coat over the base, or a painted sand-and-cement finish.
Survey every elevation: tap for hollow render, map cracks, find the DPC line and check sills, copings and fittings.
Scaffold the house and protect glazing, doors, paths, drains and planting.
Hack off failed render or dash to masonry, or cut back to a sound edge where areas stay.
Repair the masonry: repoint loose joints, replace spalled bricks, dub out hollows.
Fix a bell-cast bead above the DPC, corner and stop beads, and form reveals and sill details.
Apply the base coat with mesh where specified and let it cure.
Apply the finish coat and protect it from rain, frost and fast drying.
Refit pipes, lights and brackets, clean down and record the system and colour used.
Beads, sills and the base of the wall
Most of the long-term trouble on a rendered house starts at its edges. K Rend's design guidance says render should not bridge the damp-proof course, because a continuous coat down to the ground forms a path for damp to climb. The new render therefore stops above the DPC on a bell-cast bead, which kicks the bottom edge out so rain drips clear of the wall below. Sills and copings should project with a drip groove, and gutters and downpipes should keep water off the face; where an old sill sits almost flush, it is worth asking whether it can be extended before the new coats go on.
Bays, porches, the panel above a garage roof and the returns beside a front door all need their own beads and stopping points. Corner beads give straight arrises; stop beads finish the render neatly against frames and brick. Weather governs the programme as well. K Rend's monocouche data sheet rules out application below 5°C, above 30°C or with frost forecast within 24 hours, and its general instructions ask for protection from rain and frost for the first 48 hours, so a whole-house job in winter can stall for days at a time.
Permission and the record you keep
Government guidance on householder permitted development says that in a conservation area, which counts as article 2(3) land, cladding any part of a house with render or pebble dash is not permitted development and needs a planning application. Doncaster's conservation areas include places such as Bawtry and Conisbrough, so check the council's map for your address, and ask whether an Article 4 direction applies. When the job is finished, keep the product names, colour references and photographs of the stripped walls; they tell the next person exactly what is behind the finish.
Common questions
Can the original house and a newer extension end up with one finish?
Yes, in appearance. The backgrounds are still prepared on their own terms: stripped brick on the house may need repairs and dubbing out, while new blockwork on the extension may need neither. A bead or movement joint where the two structures meet lets them move slightly without cracking the render across the junction.
See housing and planning information for Doncaster and nearby places, including the source and geography behind each figure.