Rendering a single wall
Wall Rendering Doncaster: Gables, Extensions and Garden Walls
Wall rendering is the smaller job: one face of a building, or a freestanding wall, rather than the whole house. It covers new blockwork on a rear extension, a gable that has weathered badly, a side wall with spalling brick, or a garden wall that needs a tidy, weatherproof face. The coats are the same as on a full house; the edges are what make a single wall different.

On this page
New blockwork on an extension
A new extension usually arrives as bare blockwork, which is a good background if it is clean, sound and has flush joints. K Rend's data sheet for its K Mono describes it as a one-coat finish for most moderate to low strength blockwork: sprayed to 17-18mm, levelled with a straight edge, left 3-24 hours to set and then scraped to texture. Alternatively a cement base coat goes on first and a thin silicone finish follows once the base has cured.
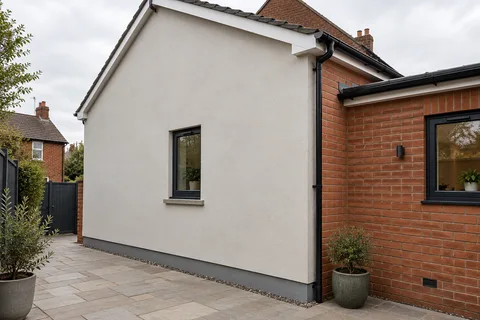
The awkward part is where the extension meets the house. Two structures built years apart will move a little differently, so the render needs a planned break there, normally a stop or movement bead at the internal corner, rather than a continuous coat that will crack along the joint. K Rend's guidance also warns against stopping work part-way across an area of walling, which leaves an unsightly joint. Each face should be finished in one session from corner to corner or bead to bead, which affects how the scaffold and the labour are planned.
- Set the edges Decide where new render stops against brick, stone or an existing finish.
- Prepare the background Remove loose material, repair masonry and prepare suction and surface key. Existing paint needs a specified removal or alternative treatment.
- Base coat Built up to level the wall, with mesh where backgrounds change or crack.
- Finish Matched to the rest of the house or chosen as a deliberate contrast.
- Shed the water Copings, sills and the base bead keep rain off the top and away from the bottom edge.
The usual order of work. The survey and the chosen products decide the actual steps.
Sand-and-cement on an existing brick wall
Traditional sand-and-cement render is mixed on site from sharp sand and cement, usually with lime or a plasticiser to make it workable. It goes on in at least two coats: a first coat scratched to give a key, then a finishing coat floated to a smooth or lightly textured surface, which is normally painted with masonry paint afterwards. It is cheap in materials and familiar to most plasterers, but it is rigid and its colour depends entirely on the paint.
On a brick gable it can work well if the brickwork is sound, loose joints are raked out and very absorbent bricks are damped down first so the render is not starved of water. On an older solid wall of soft brick or stone it is a poor choice. SPAB explains that cement render is more rigid than the wall, so hairline cracks form, draw in rain and trap it behind an impervious skin. For that kind of wall, lime render is the better starting point.
Mark the wall's extent, returns and reveals on a photograph and agree where the render stops.
Clean the background, rake out loose joints and repair damaged bricks or blocks.
Fix a bell-cast bead above the DPC and stop beads at junctions with brick or another structure.
Damp down an absorbent background, then apply the first coat and key it.
Apply the finish coat across the whole face in one session to a bead or corner.
Protect the new work from rain, frost and strong sun while it sets.
Garden and boundary walls
A freestanding wall is wetter than a house wall. Rain reaches both faces and soaks in from the top, so the coping matters more than the render: it should overhang both sides with a drip, which matches K Rend's advice that copings project clear of the face so water drops away from the render. A wall without a proper coping will push water down behind the render and blow it off within a few winters.
A wall that holds back soil is wetter still, because the retained ground keeps feeding moisture into the masonry from behind. Rendering the exposed face of that kind of wall traps the moisture, which is exactly the problem SPAB describes for impervious coatings. Ask how water from the retained side will get away, and whether the wall should be rendered at all, before agreeing a finish. On any boundary wall, check who owns it and whether the neighbour's face is included.
Common questions
Will a newly rendered wall match the rest of the house?
Not exactly, at first. Fresh render is cleaner and often a little different in shade from walls that have weathered for years, and K Rend notes slight shade variation between batches of natural materials. A sample panel on site, viewed beside the existing walls, is the best way to judge whether a near match or a deliberate contrast will look better.
Does the render have to stop above the DPC on a garden wall too?
If the wall has a DPC, yes; bridging it gives damp a route up into the rendered face. Many older garden walls have no DPC at all, which is one reason they stay damp and why the coping and the choice of render matter so much.
See housing and planning information for Doncaster and nearby places, including the source and geography behind each figure.