Silicone render systems
Silicone Rendering Doncaster: Thin-Coat Coloured Finish
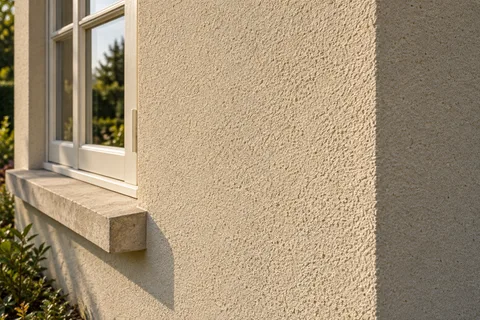
Silicone render is not a thick layer of silicone. It is a ready-mixed, coloured finish only about as thick as its largest grain, trowelled over a cement base coat that does the structural work. People choose it for the colour range, the fine texture and a surface that sheds rain, but it only performs as well as the base and the wall beneath it.

On this page
The layers in a silicone system
Taking K Rend's system as an example, the finish is its Silicone TC: a cement-free render bound with a silicone resin emulsion and an acrylic dispersion, with a biocide added against moulds and algae. The data sheet describes a water-repellent surface that still lets water vapour pass. It comes in a 1.5mm grain (TC 15) and a 3mm grain (TC 30), and each is applied to the thickness of its largest grain, so the whole finish is a few millimetres at most.
Underneath sits a base coat such as K Rend's HP14 Base, a polymer-modified cement render applied at a nominal 4-6mm with alkali-resistant mesh bedded in where needed. K Rend asks for freshly applied base coats to be left at least 14 days before the finish starts. A colour-matched primer then goes on and is given 24 hours to dry. So the build-up on a prepared wall is base coat and mesh, primer, then the silicone finish, and each stage has its own waiting time.
- Sound background A background accepted by the specified system. Keeping old render requires a system-specific assessment of its bond and condition.
- Beads Corner, stop and base beads set the edges and straight lines.
- Basecoat with mesh Glass-fibre mesh embedded in the basecoat resists cracking.
- Primer Where the system requires it, tinted towards the finish colour.
- Silicone finish A thin, through-coloured, water-repellent coat that forms the texture.
Wall on the left, finish on the right. Not to scale: coats, thicknesses and primers follow the chosen manufacturer’s system and the condition of the wall.
When silicone suits the wall, and when it does not
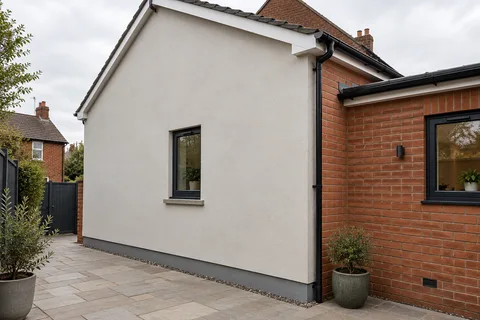
It suits new blockwork on an extension, a house that has just been stripped of failed render or pebbledash and needs a base coat anyway, and the render layer of an external insulation system. On those backgrounds the base coat creates the flat, sound surface the thin finish needs, and the through-coloured topcoat avoids repainting.
It does not suit a wall with hollow or loose render left in place. A finish this thin follows whatever is beneath it and cannot hold failing material on. K Rend also says not to apply it onto damp or frozen substrates, so a wall that is still wet after stripping has to dry first. On an older solid wall of soft brick or limestone, take advice before choosing any cement-based base coat; lime render may be the right system there instead.
Applying it: weather and the wet edge
The data sheet sets a minimum of 5°C for both the wall and the air, and rules out strong sun, strong wind and rain while the finish dries. The surface is rubbed up with a plastic float in a circular motion to raise the texture. Each continuous surface has to be completed without interruption, working to a wet edge, because a finish that has started to dry will show a line where fresh material meets it.
In practice that means the scaffold and the team have to allow a whole elevation to be finished in one go, from corner to corner or bead to bead. Stop beads at window reveals and against brickwork give the finish a clean edge, and the bell-cast bead above the DPC sets the bottom line. Masking glass, sills, doors and brick before work starts is part of the job, not an extra.
Strip or repair the wall until the background is sound, then let it dry.
Fix bell-cast, corner and stop beads.
Apply the base coat and embed the mesh, then leave it to cure.
Apply the colour-matched primer and let it dry.
Trowel the silicone finish to grain thickness and rub up the texture, a whole elevation at a time.
Protect the fresh finish from rain and from drying too fast.
Aftercare
A silicone finish resists dirt better than plain paint, but it is not maintenance-free. North-facing walls that stay damp can still grow algae once the biocide weakens, and splash-back at the base of the wall marks any colour. K Rend's instructions for cleaning its render finishes suggest a warm, low-pressure wash with a suitable detergent and a fungicidal wash on elevations prone to algae. Keep the product name and colour reference so a later repair can be matched to the same system.
Common questions
Can silicone render go straight over old pebbledash?
Not directly. The thin finish would follow every stone. If the dash is firmly bonded, a base coat may be able to level it first; if it sounds hollow, it should come off. Either way the decision rests on tapping and inspecting the dash, not on the finish you prefer.
See housing and planning information for Doncaster and nearby places, including the source and geography behind each figure.