Before the survey
Preparing for a Rendering Survey in Doncaster
You do not need to diagnose your own walls before asking for a rendering survey. It helps, though, to know what the surveyor will be looking for, to have photographs and history ready, and to leave with clear answers about what is wrong with the render and what will be done about it.

On this page
What happens at a rendering survey
Most of a render survey is tapping and looking. The surveyor works along each wall knocking the surface lightly; sound render gives a firm note and render that has come away from the brick sounds dull. Hollow areas are marked, because they show how much render has actually failed, which is often far more than the visible cracks suggest.
Cracks are then read for direction and width. A web of fine cracks across the surface is usually shrinkage in the top coat. A crack running from the corner of a window, or a stepped crack following the brick joints, points to movement in the wall and needs a different response. The base of the wall comes next: whether the render runs down over the damp-proof course to the ground, whether paving or soil has been built up against it, and whether the bottom edge is crumbling.
The surveyor should also look up. Sills and copings need to project with a drip so rain falls clear; gutters and downpipe joints that leak leave streaks and blown patches underneath. Inside, damp patches on the inner face of an outside wall are worth pointing out, because failed render is one of the ways rain gets in.
Finally, the surveyor will try to identify what the render is made of. SPAB notes that buildings put up before about 1800 most likely had lime render originally, and that lime looks softer and less uniform than cement. If your house, cottage or boundary wall is built of the pale limestone found west of the town, or of soft old brick, say so: a lime system may be right, and the survey should treat the wall as a breathing wall rather than a modern one.

| Check | What it tells you |
|---|---|
| Tapping the render | How much has lost its bond |
| Crack pattern | Shrinkage or movement in the wall |
| Base of wall and DPC | Whether render is bridging the damp course |
| Sills, copings, gutters | Where water is reaching the face |
| Material | Cement, dash or lime, and what can follow |
What to have ready
Take photographs of every wall from far enough back to show the whole elevation, then closer shots of cracks, stains and loose areas. Number the walls front, side, rear and so on, and use the same numbers when you describe them. A crack is much easier to interpret when the photograph shows whether it starts at a window corner, under a downpipe or where an extension joins.
Gather what you know about earlier work: when the house was last rendered or painted, any invoices or product names, patch repairs and their dates, and alterations such as a filled-in door or a new window opening. Say what you do not know as well. An unknown coating is useful information; a guessed product name is not.
Note practical limits too: a narrow side passage, a conservatory or garage roof under a wall, shared drives, and other work you have booked such as new windows or a roof. The house rendering service page shows how those details turn into a sequence of work, and why windows and roofline jobs are best settled before the render goes on.
If you have damp patches on the inside of an outside wall, mark them on a sketch of the room and note when they appear: after driving rain, all winter, or only near the floor. Patches high on a wall after rain point to water getting through cracked or hollow render or a failed sill; damp only at the bottom of a wall points the surveyor towards the base of the render and the DPC.
Questions to ask during the visit
Ask which walls sound hollow and roughly how much of each, and whether the surveyor recommends repair, recolouring or replacement for each one. Ask what they expect to find under the render, and what happens if the brick turns out to be poor once the old coat is off.
Ask how the base of the wall will be finished: the new render should stop above the DPC on a bell-cast bead rather than running to the ground. Ask whether the sills project far enough to drip clear of the new surface, and if not, what will be done. Ask which base coat and finish are proposed, why that system suits your wall, and how long each coat must be left before the next; K Rend's silicone finish, for example, needs its base coat to stand for at least 14 days.
Ask about weather. Most cement-based renders are not applied below 5°C or with frost forecast, so a winter start can mean lost days with the scaffold standing. A surveyor who can answer these plainly has understood your wall.
A worked example
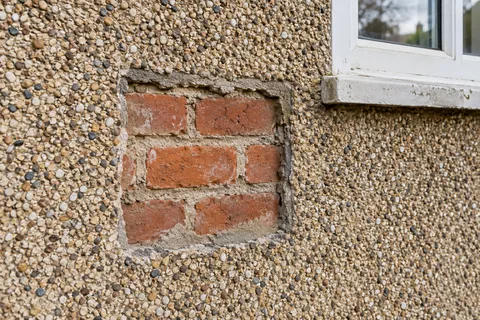
For example, on a hypothetical 1930s semi with pebbledash at the front and side and painted render at the rear, a survey might find the front dash hollow over most of its area, the side dash sound but cracked at the base where it runs over the DPC, and the rear render sound but faded and green with algae.
The resulting work would differ wall by wall: strip and re-render the front, cut back the bottom of the side wall to a bell-cast bead and repair it, and clean, treat and recolour the rear. One house, three different jobs, all following from what the tapping found rather than from the finish the owner had in mind.
The Doncaster rendering homepage links each of those services. Keep the survey notes with the agreed scope, so that if more is found once the scaffold is up, everyone can see what was known at the start.
Common questions
Should I measure the walls before the survey?
There is no need, and you should not climb to measure upper walls. Rough dimensions from the ground can help describe the size of the job, but the surveyor will measure what is needed, including reveals, returns and small panels that are easy to miss. Clear photographs are more useful than a homemade measurement, because they show the condition as well as the size.
What if the upper walls cannot be inspected from the ground?
Then the survey can only describe them as seen from below, and the scope should say so. Binoculars and a long-reach camera help, but tapping needs contact with the wall. Agree that the upper walls will be tapped as soon as the scaffold is up, before stripping starts, and that any change to the planned work is explained and agreed then, with photographs.
See housing and planning information for Doncaster and nearby places, including the source and geography behind each figure.